
Author: Joseph’s Keeper

  • Complete Health Guide for Kittens

    Complete Health Guide for Kittens

    Bringing a kitten home is one of the most exciting moments for any cat lover, but it also raises a lot of practical questions. Many new owners aren’t sure exactly when the first vet visit should happen, which vaccines actually matter, or what a normal kitten milestone looks like versus a red flag. This guide walks through the essentials of kitten health during the first year, from that first checkup through spaying or neutering.

    Your Kitten’s First Vet Visit

    Most veterinarians recommend scheduling a first checkup within the first week of bringing a kitten home, even if the kitten seems perfectly healthy. This visit sets a baseline for weight, overall condition, and any early concerns like parasites or congenital issues.

    During this first appointment, a vet will typically cover the following:

    • A full physical exam, including eyes, ears, teeth, and coat condition
    • A fecal test to check for intestinal parasites
    • The start of the core vaccination series
    • A discussion of feeding, litter box habits, and indoor safety
    • A plan for spaying or neutering timing

    Vaccination Schedule: What to Expect

    Protection passed from a mother cat can interfere with a kitten’s response to early vaccines, which is why several visits are needed. Your veterinarian will set the schedule for the products used. For the usual injected FVRCP series, the AAHA/AAFP outline is:

    1. Start no earlier than 6 weeks of age: FVRCP protects against feline herpesvirus/rhinotracheitis, calicivirus, and panleukopenia.
    2. Repeat every 3 to 4 weeks through 16 to 20 weeks of age; do not stop the series at 14 weeks.
    3. Discuss an FVRCP revaccination at 6 months with your vet.
    4. Rabies timing follows the vaccine label and local legal requirements.

    (AAHA/AAFP vaccination guidelines)

    The AAHA/AAFP guidelines consider feline leukemia virus (FeLV) vaccination core for cats younger than one year because of their age-related susceptibility. Your vet should check FeLV status before vaccination and plan later boosters around exposure risk. Exact timing still depends on the product, your kitten’s health, and local requirements. (AAHA/AAFP)

    Deworming and Parasite Prevention

    Discuss deworming and ongoing parasite prevention at the first visit, even if your kitten looks healthy. Your vet can choose an appropriate product and repeat-treatment plan based on age, history, testing, and local risks. (AAHA/AAFP)

    Flea prevention is worth discussing at the same visit. Indoor kittens can need parasite protection too; ask your vet to confirm that any product is suitable for your kitten before using it. (AAHA/AAFP)

    Spaying or Neutering: Timing and Benefits

    For cats not intended for breeding, the AAFP recommends spaying or neutering by five months of age. Your vet should tailor the timing to your kitten’s health and the procedure rather than waiting automatically until six months. (FelineVMA/AAFP)

    Beyond preventing unwanted litters, spaying and neutering is associated with a lower risk of certain reproductive cancers and can reduce behaviors like territorial spraying or roaming instincts as a cat matures.

    Nutrition and Growth Milestones

    Kittens grow quickly and have different nutritional needs than adult cats, which is why a kitten-formulated food matters during this stage. Look for a food labeled for growth or “all life stages” on the label, and ask your vet about appropriate portion sizes as your kitten grows.

    Most kittens transition to adult food somewhere between 10 and 12 months of age, though larger or slower-maturing cats may stay on kitten food a bit longer. Your vet can help you judge the right timing based on your cat’s growth and body condition.

    Signs Something May Be Wrong

    Kittens can become seriously ill quickly. Seek emergency veterinary care immediately for breathing difficulty, very pale or blue gums, collapse, extreme weakness, or straining without passing urine or stool. (Merck Veterinary Manual) Contact your vet promptly about other changes such as:

    • Lethargy or a kitten that suddenly seems unusually quiet or weak
    • Refusal to eat; contact your vet immediately rather than waiting for a set number of hours. (Cornell Feline Health Center)
    • Vomiting or diarrhea, especially if repeated or accompanied by other symptoms
    • Visible worms in stool or a noticeably bloated belly
    • A kitten that feels unusually cold or suddenly becomes weak; seek veterinary advice immediately
    • Litter box changes; unproductive straining needs immediate veterinary assessment

    Building Healthy Habits Early

    The habits you establish in the first year tend to carry forward for life. Getting a kitten comfortable with gentle tooth brushing early, for example, can make a real difference later on, since dental disease is one of the most common issues cat owners eventually deal with as their cats age.

    Keeping an eye on healthy weight gain from the start matters too, since kittens that grow into overweight adult cats face a higher risk of joint strain and metabolic issues down the road. If you’re already noticing changes in an older cat’s weight or teeth, it may be worth reading more about dental and tartar care in indoor cats or weight management in indoor cats for a sense of what to watch for over the years ahead.

    When to See a Vet

    Beyond scheduled vaccine and wellness visits, contact your veterinarian promptly if your kitten seems unwell. If your kitten stops eating, call immediately. Breathing difficulty, collapse, extreme weakness, or unproductive litter box straining calls for emergency care right away. (Cornell Feline Health Center) (Merck Veterinary Manual)

    When you are unsure about a change, call your vet or an emergency clinic for advice. Do not delay emergency care while waiting for a routine appointment or callback.

    Quick Takeaways

    • Schedule a first vet visit within the first week of bringing your kitten home.
    • The initial FVRCP series continues every 3 to 4 weeks through 16 to 20 weeks; your vet sets the complete vaccine plan.
    • Start a veterinarian-guided parasite-prevention plan early and keep it up as your cat grows.
    • Discuss spaying or neutering by five months if your cat is not intended for breeding, with timing tailored by your vet.
    • Seek emergency care for breathing difficulty or unproductive litter box straining; call your vet immediately if your kitten stops eating.

    This article is for general informational purposes only and is not a substitute for professional veterinary advice, diagnosis, or treatment. Always consult your veterinarian regarding your pet’s specific health needs.

    Aging gracefully, together.

    Photo by foshie on Flickr, licensed under CC BY 2.0.

  • How to Find Pet-Friendly Hotels and Boarding for Senior Dogs and Indoor Cats

    How to Find Pet-Friendly Hotels and Boarding for Senior Dogs and Indoor Cats

    Planning a trip when you share your home with an aging dog or a set-in-her-ways indoor cat can feel more complicated than packing your own suitcase. Many pet parents notice that the options that worked fine for a younger, more adaptable animal suddenly feel riskier once joints get stiffer, eyesight fades, or a cat’s routine becomes the thing holding her whole day together.

    Why Travel Planning Looks Different With an Older Pet

    A younger dog might shrug off a weekend at a busy boarding kennel. A senior dog with arthritis, a cat with early kidney disease, or a pet on a strict medication schedule usually needs more thought. Changes in environment can be harder on animals whose bodies and routines have less flexibility built in.

    That doesn’t mean travel is off the table. It just means the decision between a pet-friendly hotel, a boarding facility, and an in-home pet sitter deserves a closer look than it might have a few years ago.

    What Makes a Hotel Truly Senior-Pet-Friendly

    Plenty of hotels advertise themselves as pet-friendly, but not all of them are set up well for an older animal. Before booking, it helps to ask a few specific questions rather than relying on the general “pets welcome” label.

    • Is a ground-floor or low-floor room available, so you can avoid elevators or long hallway walks for a dog with mobility issues?
    • Is there a quiet grass or gravel relief area close to the entrance, rather than one that requires a long walk?
    • Are there weight or breed restrictions that could exclude a larger senior dog?
    • What are the pet fees, and are they charged per stay or per night?
    • Does housekeeping need advance notice, so an anxious cat isn’t startled by a room entry?

    For an indoor cat, a hotel stay usually means keeping her contained to the room in a carrier or a small pop-up enclosure rather than letting her roam freely, since an unfamiliar space with hidden gaps behind furniture or under beds can be an easy place for a stressed cat to hide or bolt.

    Evaluating a Boarding Facility for an Older Dog or Cat

    Boarding can work well for senior pets, but the criteria that matter most shift a bit compared to a younger, more resilient animal. Ask specifically how staff handle medication administration, since many senior pets are on daily pills, eye drops, or joint supplements that need to be given on schedule.

    • What is the staff-to-pet ratio, especially overnight?
    • Is there a separate, quieter area for senior pets or cats, away from the noise of a busy dog play yard?
    • Does the facility have a relationship with a nearby veterinarian, or on-call access to one?
    • Can staff accommodate a slower feeding pace or a special diet?
    • Are vaccination and health requirements current and clearly explained?

    A short trial stay of one or two nights, well before a longer trip, can tell you a lot about how a specific facility handles an older pet’s needs in practice.

    When an In-Home Pet Sitter Might Be the Better Choice

    For many senior dogs and most indoor cats, staying in their own home with a trusted pet sitter coming in once or twice a day is the option that causes the least disruption. Familiar smells, furniture, and routines can matter a great deal to a pet whose cognitive function or comfort depends on predictability.

    This is often the gentlest choice for a cat showing signs of stress or anxiety, or for a dog with cognitive decline who tends to get more disoriented in unfamiliar places. A sitter who has met your pet in advance and has clear written instructions can also administer medication in an environment where your pet already feels safe.

    Boarding vs. Pet Sitting vs. Hotel: A Simple Way to Decide

    There isn’t one right answer for every pet, but working through a few questions in order can make the decision much clearer.

    1. How mobile is your pet? A dog who struggles with stairs or long walks may do better staying in one familiar space than adjusting to a new one.
    2. How does your pet typically respond to new environments and people? A pet who hides for days after a small change may be a poor fit for boarding.
    3. How complex is the medication or care routine? More complex routines usually favor a sitter or a facility with strong medical protocols.
    4. How long will you be away? Shorter trips often favor a sitter or in-home care; longer trips may make a well-vetted boarding facility more practical.
    5. What does your budget allow? Hotels, boarding, and sitters vary widely in cost, and it’s worth comparing quotes for the specific dates you need.

    Preparing Your Senior Dog or Indoor Cat for the Change

    Whichever option you choose, a little preparation goes a long way toward keeping a senior pet comfortable while you’re away.

    1. Write out a clear medication and feeding schedule, including exact times, doses, and any special instructions.
    2. Pack familiar bedding, a favorite blanket, or an unwashed item of your own clothing that carries your scent.
    3. Bring a current photo of your pet in case they become separated from their carrier or leash.
    4. Share your veterinarian’s contact information and, if relevant, a note about any recent diagnoses.
    5. If your pet has recently been anxious or withdrawn, mention this to caregivers to keep a closer eye on, since a familiar routine, like the kind covered in managing stress in indoor cats, is often the fastest way back to normal after a disruption.

    It’s also worth keeping a small kit of essentials on hand for travel days, similar in spirit to a well-stocked pet first aid kit, so you’re not scrambling for supplies at the last minute.

    Quick Takeaways

    • Not every “pet-friendly” hotel is set up well for a senior pet; ask about floor level, relief areas, and fees before booking.
    • Boarding facilities should be evaluated on medication handling, staff ratios, and access to veterinary care, not just amenities.
    • An in-home pet sitter is often gentler for anxious cats and dogs with cognitive decline, since it keeps them in a familiar environment.
    • A short trial stay can reveal a lot about how a boarding facility handles an older pet’s specific needs.
    • Written medication schedules, familiar bedding, and current vet contact information make any option safer and smoother.

    This article is for general informational purposes only and is not a substitute for professional veterinary advice, diagnosis, or treatment. Always consult your veterinarian regarding your pet’s specific health needs.

    Aging gracefully, together.

    Photo by Randy Son Of Robert on Flickr, licensed under CC BY 2.0.

    Sources and further reading

    These resources provide general background on the specific topics listed below. They are not a veterinary review of this article.

  • Constipation & Digestive Issues in Indoor Cats: Signs & How to Manage It

    Constipation & Digestive Issues in Indoor Cats: Signs & How to Manage It

    If your indoor cat has been spending longer than usual in the litter box, straining without much to show for it, or crying out mid-squat, you’re not imagining a problem. These signs can come from constipation or a urinary problem. Repeated straining with little or no urine is an emergency. Seek veterinary care immediately, including when you cannot tell whether your cat is trying to urinate or defecate. (Cornell Feline Health Center)

    Why Constipation Can Happen

    Dehydration, pain, and reluctance to use the litter box can contribute to constipation. Indoor living alone does not tell you why a cat is having digestive trouble. A veterinarian can check for an underlying cause. (Merck Veterinary Manual)

    Age adds another layer. As cats get older, arthritis can make the physical act of squatting in a litter box uncomfortable, and kidney changes can affect hydration. None of this means a digestive problem is inevitable, but it does mean it’s worth paying closer attention as the years go on.

    Common Signs of Constipation and Digestive Trouble

    Cats are private about bathroom habits, which means owners often notice a problem later than they’d like. Keeping a rough mental note of your cat’s litter box routine makes it much easier to spot when something changes.

    • Straining or crying out while trying to defecate
    • Hard, dry, or pellet-like stool, or none at all for more than a day
    • Frequent trips to the litter box with little or no result
    • Reduced appetite or skipping meals
    • Vomiting, especially after eating
    • Lethargy or hiding more than usual
    • A visibly bloated or firm abdomen

    Do not wait two or three days if your cat is straining without passing stool or urine. Seek immediate veterinary assessment for unproductive straining, severe pain, or marked weakness. If you simply notice a change in stool frequency without distress, contact your vet for advice based on your cat’s usual routine. (Merck Veterinary Manual)

    What Causes Constipation in Indoor Cats

    Constipation has several possible causes. Identifying the cause with your veterinarian matters more than assuming that every cat needs the same home remedy.

    • Dehydration. Inadequate water intake or illness can contribute to dry, difficult-to-pass stool.
    • Hairballs. Swallowed fur can build up in the digestive tract and contribute to blockages, particularly in long-haired or heavy-shedding cats — staying on top of regular hairball management can reduce how often this becomes an issue.
    • Diet. Your vet may recommend a diet change, but extra fiber is not the right first step for every constipated cat.
    • Litter box avoidance. A dirty box, an inaccessible location, or a box that’s hard to step into can make a cat hold it longer than is healthy.
    • Reduced mobility or arthritis. Older cats may avoid squatting fully because it’s uncomfortable, which affects how completely they empty their bowels.
    • Underlying conditions. Kidney disease or a chronic condition called megacolon (a loss of normal colon muscle function) can cause recurring constipation and need veterinary management rather than home remedies.

    How to Help a Constipated Cat at Home

    Once your veterinarian has confirmed mild constipation and advised home care, the following adjustments may be useful. Do not try them first for a cat with unproductive straining, vomiting, loss of appetite, or pain.

    1. Support hydration. Keep fresh water available and ask your vet whether wet food or adding water to food would suit your cat. You can offer water in several quiet locations; a fountain is optional, since cats differ in what they prefer.
    2. Check the litter box setup. Make sure there’s at least one box per cat plus one extra, that it’s scooped daily, and that older or arthritic cats can step in easily. Lower sides can make entry and exit easier. (AAHA/AAFP)
    3. Ask before adding fiber. Discuss pumpkin or any fiber supplement with your vet first. Cats should be adequately hydrated before fiber is started, because fiber can worsen impaction in a dehydrated cat. (Merck Veterinary Manual)
    4. Stay on top of grooming. Regular brushing can reduce loose fur available to swallow during self-grooming. Choose a brush your cat tolerates comfortably.
    5. Offer gentle movement. If your cat is comfortable and your vet agrees, offer short play sessions suited to their mobility.

    When to Talk to Your Veterinarian

    Contact your vet promptly about the signs below. Unproductive straining, severe pain, or marked weakness needs immediate assessment; do not wait for a stool-count threshold. (Merck Veterinary Manual)

    • A change from your cat’s usual bowel pattern, especially with discomfort or other symptoms
    • Repeated straining with visible discomfort or crying out
    • Vomiting alongside constipation
    • Blood in the stool or litter box
    • Noticeable lethargy, hiding, or loss of appetite
    • A hard or swollen abdomen
    • Constipation that keeps recurring every few weeks

    Recurring or severe constipation may point to megacolon or another underlying condition that needs diagnostic testing and a tailored treatment plan. Never give a cat a human laxative, enema, or stool softener without your veterinarian’s guidance, since some common over-the-counter products are dangerous for cats. Phosphate-containing enemas can cause life-threatening electrolyte disturbances and must not be used in cats. (Merck Veterinary Manual)

    Preventing Digestive Issues Going Forward

    Once a cat has had one constipation episode, they’re more likely to have another, so a bit of ongoing prevention goes a long way. Consistent hydration, a stable diet, regular grooming, and an accessible, clean litter box cover most of the everyday risk factors. For cats with arthritis or other mobility changes, revisiting the litter box setup every so often as they age is worth the five minutes it takes.

    Routine veterinary checkups also matter here. Recurring constipation may call for blood tests, imaging, or other testing to look for an underlying cause.

    Quick Takeaways

    • Watch for straining, hard stool, reduced appetite, or a missed bowel movement lasting more than a day.
    • Dehydration, swallowed material, painful defecation, and underlying illness are possible contributors; the cause needs assessment.
    • Hydration, accessible litter boxes, and the diet your vet recommends can support a confirmed constipation care plan.
    • Unproductive straining or suspected inability to urinate needs immediate veterinary assessment. Do not wait 48 to 72 hours.
    • Recurring constipation can signal an underlying condition like megacolon and deserves veterinary evaluation.

    This article is for general informational purposes only and is not a substitute for professional veterinary advice, diagnosis, or treatment. Always consult your veterinarian regarding your pet’s specific health needs.

    Aging gracefully, together.

    Photo by eviltomthai on Flickr, licensed under CC BY 2.0.

  • Kidney Disease in Indoor Cats: Signs & How to Manage It

    Kidney Disease in Indoor Cats: Signs & How to Manage It

    If your indoor cat has started drinking more water than usual and the litter box needs emptying more often, it’s easy to assume she’s just being extra thirsty in warm weather. Often, though, this combination is one of the earliest signals of kidney disease, a condition that affects a large share of cats as they move into their senior years. Understanding what to watch for can make a real difference in how comfortably your cat lives with it.

    What Is Kidney Disease in Cats?

    A cat’s kidneys filter waste products out of the bloodstream and help regulate hydration, blood pressure, and red blood cell production. Chronic kidney disease (CKD) develops when kidney tissue gradually loses function over months or years, which is why it’s most often diagnosed in middle-aged and senior cats. Less commonly, kidneys can fail suddenly (acute kidney injury) due to toxins, dehydration, or a blockage, which is a true emergency rather than a gradual condition.

    CKD cannot be reversed, but it can often be slowed and managed for a good stretch of time once it’s caught. That’s why recognizing the early signs matters so much.

    Early Signs and Symptoms of Kidney Disease

    Because healthy kidney tissue can compensate for a while, cats often show few obvious symptoms until a meaningful portion of kidney function is already affected. Watch for:

    • Increased thirst and more frequent trips to the water bowl
    • Urinating more often, or producing noticeably larger amounts of urine
    • Gradual weight loss, even with a normal or increased appetite at first
    • Reduced appetite or becoming more selective about food
    • A dull, unkempt coat, since grooming often becomes less of a priority
    • Bad breath with an ammonia-like odor
    • Vomiting or intermittent nausea
    • Lethargy or a general drop in energy and playfulness

    Any one of these on its own isn’t necessarily kidney disease, but a cluster of them, especially increased thirst paired with weight loss, is worth mentioning to your vet.

    What Causes Kidney Disease in Indoor Cats?

    In most cases, chronic kidney disease develops gradually and the exact starting point isn’t identifiable. Contributing factors can include genetics (certain breeds like Persians and Maine Coons carry higher risk for some kidney conditions), long-term dental disease, high blood pressure, and prior episodes of dehydration or urinary blockage. Age itself is the biggest factor: the older a cat gets, the more common some degree of reduced kidney function becomes.

    Cats recovering from earlier urinary tract issues or bladder stones may also be at somewhat higher risk, which is one more reason those earlier urinary symptoms are worth taking seriously rather than waiting out.

    How Kidney Disease Is Diagnosed

    Your veterinarian will typically run bloodwork looking at markers like BUN, creatinine, and SDMA, along with a urinalysis to check how well the kidneys are concentrating urine. Blood pressure measurement and, in some cases, imaging like an ultrasound may also be part of the workup. Diagnosis usually leads to a “staging” of the disease from early to advanced, which helps guide what kind of management plan makes sense.

    How to Manage Kidney Disease at Home

    Once your vet has confirmed a diagnosis and stage, day-to-day management becomes the main focus. A typical plan includes:

    1. Switch to a kidney-support diet. Prescription renal diets are formulated with reduced phosphorus and controlled, high-quality protein, which can ease the kidneys’ workload. Ask your vet which option fits your cat’s stage and preferences.
    2. Encourage water intake. Wet food naturally adds moisture, and a pet water fountain can encourage cats who prefer moving water to drink more throughout the day. Placing multiple water bowls around the home is a simple, low-cost way to support the same goal.
    3. Keep up with regular bloodwork. Kidney values are typically rechecked every few months so your vet can adjust the plan as needed.
    4. Ask about supportive medications. Depending on the stage, your vet may recommend phosphorus binders, anti-nausea medication, appetite stimulants, or blood pressure medication.
    5. Learn subcutaneous fluids if recommended. In more advanced cases, vets often teach owners to give fluids under the skin at home, which is more manageable than it sounds and can meaningfully improve a cat’s comfort and hydration.

    Weight can be tricky to track once appetite changes, so if your cat’s kidney diagnosis comes alongside noticeable weight shifts, our guide to weight management in indoor cats covers how to monitor body condition safely.

    When to Talk to Your Veterinarian

    Schedule a vet visit if you notice increased thirst or urination, unexplained weight loss, or a drop in appetite lasting more than a day or two. Seek prompt or emergency care if your cat stops eating entirely, vomits repeatedly, seems weak or unresponsive, or you notice she is straining to urinate or not producing urine at all, since that combination can point to a urinary blockage rather than kidney disease alone and needs immediate attention. Regular senior wellness exams with bloodwork, even before symptoms appear, remain the most reliable way to catch kidney changes early.

    Quick Takeaways

    • Increased thirst, more frequent urination, and gradual weight loss are the classic early signs of kidney disease in cats.
    • Chronic kidney disease is most common in older cats and can’t be reversed, but it can often be slowed with early management.
    • Diagnosis relies on bloodwork (BUN, creatinine, SDMA) and a urinalysis, plus blood pressure checks.
    • Prescription renal diets, encouraging water intake, and regular vet-monitored bloodwork form the core of home management.
    • Contact your vet promptly for appetite loss, repeated vomiting, or any sign your cat isn’t urinating normally.

    This article is for general informational purposes only and is not a substitute for professional veterinary advice, diagnosis, or treatment. Always consult your veterinarian regarding your pet’s specific health needs.

    Aging gracefully, together.

    Photo by Valeria Makai on Pexels.

    Sources and further reading

    These resources cover the specific topics listed below. They provide general education and do not constitute a veterinary review of this article.

  • Building a Pet First Aid Kit

    Building a Pet First Aid Kit

    Many pet owners only think about first aid the moment they need it, usually while standing in the kitchen at 10 p.m. wondering whether the cut on a paw needs a vet visit or just a clean bandage. A first aid kit can support interim care while you arrange veterinary help; it cannot guarantee that an injury will stay minor. (AVMA pet first aid)

    Whether you share your home with a senior dog whose joints are more prone to scrapes and slips, or an indoor cat who occasionally gets into something she shouldn’t, having the right supplies on hand and knowing how to use them is one of the simplest things you can do for your pet’s safety.

    Why a Dedicated Pet First Aid Kit Matters

    Human first aid kits are not quite right for animals. Dosing, wound care, and even basic supplies like gauze width are different for a 10-pound cat than for a 70-pound dog. A kit built specifically for your pet, and sized to their needs, means you are not improvising with whatever is in the bathroom cabinet.

    For senior pets, ask your veterinarian which supplies and handling precautions fit their existing conditions and mobility. A kit should support that plan rather than encourage treating an injury at home without advice.

    The Essentials: What to Include

    You do not need anything elaborate. A sturdy, clearly labeled container (a tackle box or a soft zippered pouch both work well) can hold these basic supplies. Review the contents and their use with your veterinarian:

    • Sterile gauze pads and self-adhering bandage wrap; leave bandage application to your vet if you are unsure, because a poorly applied wrap can cause harm. (AVMA)
    • Adhesive medical tape
    • Blunt-tipped scissors for bandage materials, and tweezers for appropriate small-object removal. Do not pull an embedded object from a wound. (AVMA)
    • Digital thermometer labeled “pet use only”; ask your veterinary team to show you how and when to use it, and do not force the procedure on an injured or struggling pet.
    • Only an antiseptic product and dilution specifically recommended by your veterinarian for your pet and the intended use
    • Sterile saline for uses your veterinarian recommends; an eye injury needs urgent veterinary assessment even if you have saline available.
    • Disposable gloves
    • A muzzle only if your veterinarian has shown you when and how it is appropriate. Never muzzle a vomiting pet. Do not muzzle a pet with breathing difficulty, facial or chest injury, or a short-nosed dog. Never leave a muzzled dog unattended. (AVMA) (Merck: first aid) (Merck: emergencies)
    • An old towel or blanket for padding or transport as directed; avoid forceful restraint, keep the airway unobstructed, and ask the emergency clinic how to move an injured pet safely. (Merck Veterinary Manual)
    • A pet first aid guide or printed instructions, since memory is unreliable under stress
    • Copies of vaccination records and any current medications, in case you need to board your pet or visit an unfamiliar clinic

    Keep a printed list of emergency numbers taped inside the kit: your regular veterinarian, the nearest emergency animal hospital, and a poison control hotline such as the ASPCA Animal Poison Control Center. Phone service can fail at the worst moment, so having numbers on paper is worth the extra minute it takes to write them down.

    Items to Use with Caution

    Hydrogen peroxide needs particular caution. Do not use it to make a cat vomit: it can seriously injure the esophagus and stomach. In dogs, use it only when a veterinarian or animal poison-control specialist specifically directs it for that exposure; it can cause digestive-tract injury or be inhaled into the lungs. (Merck Veterinary Manual) Do not use peroxide on wounds. If poisoning is suspected, call for professional help immediately rather than trying a home remedy. (AVMA)

    The same caution applies to human pain medication. Common over-the-counter pain relievers, including ibuprofen and acetaminophen, can seriously harm pets; acetaminophen is particularly dangerous for cats. Never give any human medicine or leftover prescription without veterinary direction. (FDA: pain relievers for pets)

    Building a Travel or Car Version

    If you regularly travel with your pet, a smaller duplicate kit can be useful. Include gauze, tape, saline, gloves, and your emergency contact list, plus any items your veterinarian recommends. Keep supplies within their labeled storage conditions; a hot or freezing car is not suitable storage.

    For senior dogs who ride along less steadily than they used to, it is also worth keeping a non-slip mat or a portable ramp in the car. Reducing the chance of a fall in the first place is just as valuable as being ready to treat one.

    Where to Keep Your Kit and How Often to Check It

    Store your kit somewhere easy to grab quickly, ideally near an exterior door or in the same spot every time, so every household member knows where to find it. Avoid areas with extreme heat or cold, such as a car trunk in summer, since that can degrade supplies like antiseptic solution and medication.

    1. Check the kit every three to six months and replace anything expired, such as antiseptic solutions or saline.
    2. Restock any items used since the last check.
    3. Confirm emergency phone numbers are still current, especially if you have moved or changed veterinarians.
    4. Update medication and vaccination copies after any changes to your pet’s care plan.

    When to Call Your Vet or an Emergency Clinic

    First aid supports veterinary care. Trouble breathing, choking, severe bleeding, collapse, or an eye injury needs immediate emergency veterinary attention. Call ahead while arranging transport if you can do so without delaying care. Other concerns below also warrant immediate veterinary advice. (Merck Veterinary Manual)

    • Difficulty breathing or choking: seek emergency care immediately. Keep the pet calm and do not force fingers or tools into the throat. (AVMA)
    • Severe or uncontrolled bleeding: seek emergency care immediately; apply steady pressure with clean cloth if safe, without delaying transport.
    • Suspected ingestion of a toxic substance, plant, or medication
    • Collapse, seizures, or sudden loss of coordination. During a seizure, do not restrain the pet or put your hands near the mouth. (AVMA)
    • A bloated, hard, or visibly painful abdomen
    • Any injury involving the eyes

    When in doubt, it is always safer to call and ask than to wait and see. Veterinary staff would much rather field a question that turns out to be minor than have an owner delay care for something serious.

    Quick Takeaways

    • Build a pet-specific first aid kit rather than relying on a human one, and size the contents to your pet.
    • Tape a list of emergency numbers, including a poison control hotline, inside the kit where you can find it under stress.
    • Do not give medicines or induce vomiting without professional direction. Never use peroxide to induce vomiting in cats or to clean wounds.
    • Take a smaller kit when traveling, while protecting its contents from temperature extremes.
    • Check and restock the kit every three to six months, and know the signs that mean it is time to call a professional right away.

    A well-stocked kit works hand in hand with having a trusted veterinarian you already know and can call quickly when something goes wrong. It is also worth thinking about how unexpected injuries fit into your broader plan for covering veterinary costs, which is where understanding your options for pet insurance can make emergencies less financially stressful as well.

    This article is for general informational purposes only and is not a substitute for professional veterinary advice, diagnosis, or treatment. Always consult your veterinarian regarding your pet’s specific health needs.

    Aging gracefully, together.

    Photo by Roger Brown on Pexels.

  • Allergies & Skin Issues in Indoor Cats: Signs & How to Manage It

    Allergies & Skin Issues in Indoor Cats: Signs & How to Manage It

    If your indoor cat has been scratching more than usual, overgrooming a patch of fur bald, or developing small scabby bumps along the neck and back, you’re not imagining a change. Skin allergies are one of the most common reasons cats end up at the vet, and staying indoors doesn’t make a cat immune to them.

    Why Indoor Cats Still Get Allergies

    It’s a common assumption that allergies are mostly an outdoor-cat problem, tied to pollen and grass. In reality, indoor cats are exposed to plenty of potential triggers without ever leaving the house: a single flea carried in on a shoe or another pet, dust mites in carpet and bedding, mold spores, pollen that drifts in through open windows, certain ingredients in their food, and even the plastic material of a food bowl.

    Because the triggers are less obvious indoors, allergic skin problems in indoor cats are sometimes mistaken for something else entirely, including stress-related overgrooming, which can look surprisingly similar and is worth ruling out alongside emotional causes when the pattern isn’t clearly seasonal.

    Common Signs of Skin Allergies in Cats

    • Excessive licking or grooming, especially on the belly, inner thighs, or lower back, sometimes to the point of bald patches
    • Small, crusty bumps scattered across the neck, back, or base of the tail (a pattern vets call miliary dermatitis)
    • Red, inflamed, or scabbed skin, particularly around the face, ears, neck, or belly
    • Recurring ear infections or head-shaking
    • Raised, thickened sores on the lips or in the mouth (eosinophilic granuloma complex)
    • Sneezing or watery eyes alongside skin symptoms, which points more toward an environmental trigger
    • Digestive upset such as vomiting or soft stool occurring alongside skin flare-ups, which can point toward a food allergy

    Any single sign here could have another explanation, but a combination of several, especially if it keeps coming back, is worth mentioning at your cat’s next visit.

    The Three Main Types of Allergies Behind Skin Symptoms

    Nearly all allergic skin disease in cats falls into one of three categories, and figuring out which one is involved changes the entire management plan.

    • Flea allergy dermatitis: Some cats have such a strong reaction to flea saliva that a single bite can trigger days of intense itching, even if you never actually spot a flea on your cat. This is why year-round flea prevention matters for indoor cats too, not just cats that go outside.
    • Food allergies: These typically develop over time to a protein or ingredient a cat has eaten regularly, not a brand-new food. Diagnosis relies on a strict elimination diet trial under veterinary guidance, not simply switching brands on your own.
    • Environmental (atopic) allergies: Reactions to pollen, dust mites, mold spores, or similar particles that make their way indoors. These may start out seasonal and gradually become a year-round issue as sensitivity builds.

    A smaller number of cats also react to direct contact with something, such as a plastic bowl or a cleaning product residue on bedding, which tends to show up as irritation concentrated on the chin or areas that touch the surface directly.

    How Veterinarians Diagnose the Cause

    1. Rule out fleas and parasites first. This is the fastest, cheapest thing to eliminate and is often addressed before anything else, even if you haven’t seen fleas yourself.
    2. Run a strict elimination diet trial. If food allergy is suspected, your vet will usually recommend a hydrolyzed or novel-protein diet fed exclusively (no treats, no table scraps) for 8 to 12 weeks to see if symptoms resolve.
    3. Consider allergy testing for suspected environmental triggers. Intradermal skin testing or blood-based allergy panels, often through a referral to a veterinary dermatologist, can help identify specific environmental allergens.
    4. Skin scrapes or cultures. These rule out mites, ringworm, or a secondary bacterial or yeast infection that can complicate or mimic allergic skin disease.

    How to Help Manage Skin Allergies at Home

    1. Keep flea prevention consistent year-round. Use a veterinarian-recommended product on a strict schedule rather than only during warmer months, since even indoor cats are at risk.
    2. Follow through on a diet trial completely if one is recommended. Stopping partway through, or sneaking in an occasional treat, can make the results impossible to interpret and mean starting over.
    3. Reduce environmental allergens at home. Vacuum frequently, wash bedding regularly in unscented detergent, and consider a HEPA air filter in the rooms your cat spends the most time in.
    4. Switch to a ceramic or stainless-steel bowl if you notice chin irritation or acne-like bumps, since some cats react to certain plastics over time.
    5. Stay consistent with prescribed medication. Whether it’s a steroid, an immune-modulating medication, or a targeted anti-itch treatment, stopping as soon as symptoms improve is one of the most common reasons flare-ups come right back.
    6. Keep nails trimmed to limit the skin damage and secondary infections that come from repeated scratching at an itchy spot.

    When to Talk to Your Veterinarian

    Occasional scratching is normal cat behavior, but reach out to your vet if you notice scratching or overgrooming that persists for more than a week or two, open sores, oozing, or an unpleasant odor from the skin, noticeable hair loss, or skin symptoms that show up alongside vomiting or diarrhea. Never give your cat human antihistamines, steroid creams, or any other medication without checking with your veterinarian first, since dosing and safety are very different for cats.

    Quick Takeaways

    • Indoor cats can develop allergies from fleas, food, and environmental particles that make their way inside, not just from time spent outdoors.
    • Flea allergy dermatitis, food allergies, and environmental (atopic) allergies are the three main categories, and each is managed differently.
    • A strict, vet-guided elimination diet trial, not casual food-switching, is the standard way to diagnose a suspected food allergy.
    • Year-round flea prevention is worthwhile even for cats that never go outside.
    • Persistent, worsening, or recurring skin symptoms are worth a veterinary visit rather than months of guessing.

    This article is for general informational purposes only and is not a substitute for professional veterinary advice, diagnosis, or treatment. Always consult your veterinarian regarding your pet’s specific health needs.

    Aging gracefully, together.

    Photo by Mahmoud Yahyaoui on Pexels.

    Sources and further reading

    These resources cover the specific topics listed below. They provide general education and do not constitute a veterinary review of this article.

  • Seven Pills a Day for a Five-Pound Dog: The Routine That Ended Our Nightly Standoff

    Seven Pills a Day for a Five-Pound Dog: The Routine That Ended Our Nightly Standoff

    Seven pills a day, for a dog who weighed five pounds. That was the reality of caring for Joseph, my Yorkshire Terrier, once he passed ten years old and his heart and airway problems both needed daily medication to keep him comfortable. If you’re standing in your kitchen right now holding a pill your dog has already learned to spot and refuse, I want you to know that the standoff you’re in is not a failure of willpower. Finding a workable routine for Joseph took trial and error.

    Personal experience: this is Joseph’s story, not a veterinary-tested medication method. His medicines, capsule handling, and head position should not be copied as instructions for another dog. Ask your veterinarian to demonstrate a method suited to your dog, especially with breathing or swallowing problems.

    Why Seven Pills Became the Daily Reality

    Joseph’s medication load didn’t start out this heavy. In the beginning it was just a heart medication and a bronchodilator, twice a day, to manage early heart failure alongside tracheal collapse. But as his condition progressed, a diuretic and a stomach protectant joined the morning dose, and a liver-and-joint support supplement joined the evening dose.

    By the time the routine settled, it looked like this: four pills in the morning (heart medication, bronchodilator, diuretic, stomach protectant) and three in the evening (heart medication, bronchodilator, and a combined liver-and-joint supplement). Seven pills, twice-daily heart and airway medication doing the heavy lifting of both totals.

    Keeping to the schedule was harder than it sounded. For a dog under five pounds, giving seven pills across two daily medication sessions was a genuine test of patience for both of us.

    Every “Easy” Trick Joseph Outsmarted

    Like most new caregivers, I started with the tips everyone recommends. Joseph’s nose and tongue defeated every one of them within about a week.

    • Sausage and cheese: worked for a few days, then Joseph figured out he could lick off the fatty sausage and leave the bitter diuretic pill sitting untouched on the floor.
    • Pill pockets: by day three, he wouldn’t even approach one. He’d turn his head and growl at the smell, and forcing it into his mouth just made him foam at the mouth and spit it back out. This was a failed attempt, not a technique to copy.
    • Crushing pills into wet food: the worst failure of all. No canned food could mask the bitterness of the heart medication and diuretic. One bite in, he’d cough it back up and then refuse the entire bowl, food he’d normally loved, out of suspicion. Do not crush or open a medicine unless your veterinarian has confirmed that this is appropriate for that exact formulation. (FDA medication-safety guidance)

    Every clumsy attempt to disguise the medication didn’t just fail. It cost me an entire mealtime and chipped away at his trust in me.

    The Principle That Ended the Standoff

    For Joseph, I eventually stopped trying to hide his medicines in food and found a routine he accepted. That experience does not show that taste is irrelevant or that one pilling technique suits every dog.

    What I eventually settled into was a routine that took about 30 seconds when I first learned it, and dropped to roughly 10 seconds once it became second nature. Before changing how a medicine is given, get your veterinarian or pharmacist’s instructions for every medicine and formulation. Do not crush, open, mix, or repackage them on the strength of this story. (FDA medication-safety guidance)

    1. What I did with capsules. I consolidated each round of medications into one or two small gelatin capsules. I am describing what happened with Joseph, not recommending a capsule size or confirming that his combination was safe. A veterinarian or pharmacist must check each medicine before any mixing or repackaging.
    2. What I used as a coating. I used a thin layer of unsalted butter. That is part of Joseph’s story, not a recommendation to use butter or oil with another dog’s medication. Check food and medicine compatibility first. (Cornell: oral medications)
    3. What I noticed about handling. I kept Joseph’s head close to level, and I did not observe coughing with that routine. I cannot infer an airway mechanism or a safe head angle for other dogs from that experience. The same caution applies to my account of Joseph and his ramp. Ask your veterinarian for an individualized demonstration; do not use this story as a mouth-placement or restraint guide.
    4. What I tried to encourage swallowing. A short puff of air on Joseph’s nose was part of my routine. It is not a reliable test that a pill has been swallowed, and this account does not establish that it is suitable for a dog with airway disease.
    5. The reward. After he swallowed, I offered a small piece of meat or a lick of squeeze treat. He came to wait for his treat afterward. For another dog, ask which rewards fit the medication instructions and diet.

    Once this became routine, what used to be a 30-minute standoff shrank to about 10 seconds. Joseph stopped running from me at pill time and started waiting for his treat right after.

    What’s Different for Caregivers Today

    Back in 2012, I was hand-filling human gelatin capsules because that was what was available. The tools have improved a lot since then.

    • Pill dispensers: ask your veterinary team whether a dispenser suits your dog and to demonstrate its use. This account does not establish that a particular mechanism is safer for a small mouth or a compromised airway.
    • Flavored formulations or capsules: ask your veterinarian or pharmacist whether an appropriate option exists for the specific medicine. A flavored capsule is not permission to crush, open, or combine the contents of other medicines.
    • Food or water after a pill: follow the instructions for that medicine and your dog. A lick of gel treat does not prove that a capsule has reached the stomach. Ask your veterinary team what, if anything, should follow each dose; do not force a chaser into a dog that is coughing or struggling to swallow.

    When to Talk to Your Veterinarian

    Ask your veterinarian for help if your dog coughs, gags, spits out medicine, vomits after a dose, or refuses food. Do not keep forcing the attempt or guess how much to give again when a dose may have been partly swallowed. Ask whether another formulation is suitable rather than changing or compounding it yourself. (Cornell: oral medications) Breathing difficulty, blue gums or tongue, or fainting requires immediate emergency veterinary care. (Cornell: tracheal collapse)

    Quick Takeaways

    • What worked for Joseph does not establish a safe technique for another dog; taste, handling, the medicine, and the dog’s health all need consideration.
    • Do not crush, open, mix, or repackage medications unless your veterinarian or pharmacist has checked every specific medicine and formulation.
    • For dogs with breathing or swallowing problems, ask the veterinarian to demonstrate an appropriate method instead of copying a head angle from this story.
    • Do not assume a puff of air or a lick proves the full dose was swallowed; contact the veterinary team if you are unsure how much was taken.
    • A suitable reward may help make medication time less stressful; check that it fits the medicine and your dog’s diet.

    If you’re wondering why a pet care site spends this much time on one routine from over a decade ago, more about why I write this.

    This article is for general informational purposes only and is not a substitute for professional veterinary advice, diagnosis, or treatment. Always consult your veterinarian regarding your pet’s specific health needs.

    Aging gracefully, together.

    Photo by itarife / Flickr, licensed under CC BY 2.0.

  • Two Ramps Failed My Five-Pound Yorkie — So in 2012 I Built the Third

    Two Ramps Failed My Five-Pound Yorkie — So in 2012 I Built the Third

    Senior Yorkshire Terrier resting on a sofa

    Yorkshire Terrier resting on a sofa

    In 2012, you couldn’t open an app and have a custom indoor ramp on your doorstep in two days.

    Chewy had barely opened its doors. Most of what Amazon carried was either a brutally heavy plastic plank built to load a Labrador into a pickup truck, or a floral sponge staircase from a mail-order catalog. Nothing was designed for a dog who weighed five pounds.

    The year my Yorkshire Terrier Joseph turned ten, I learned that finding a ramp wasn’t just a convenience problem. With his collapsing trachea and enlarged heart, I wanted to reduce the jumping that I saw followed by coughing. Personal experience: this is my account of Joseph and a homemade ramp, not veterinary-tested safety specifications or treatment for breathing problems.

    Here’s why he refused the first two attempts, what physical specifications finally worked, and the checklist I’d use today so you don’t waste money the way I did.

    Why I wanted Joseph to stop jumping

    Ramps can be part of home adaptations for dogs with joint or mobility problems. Their suitability needs to be considered for the individual dog. (AAHA senior care guidance) My concern with Joseph also came from the coughing I observed after he jumped.

    Here is what I observed when Joseph jumped down from our 18-inch sofa. These observations do not establish what was happening inside his airway or heart.

    1. Landing. He landed on his front legs and his neck jerked downward.
    2. Gasp. I noticed a sharp gasp after the landing.
    3. Coughing. The goose-honk hacking started, sometimes lasting twenty minutes.
    4. Concern. He already had an enlarged heart, which made these episodes especially worrying.

    After these episodes, I worried about needing the emergency vet. I wanted to change how Joseph got off the sofa. A dog struggling to breathe, fainting, or developing blue gums or tongue needs immediate veterinary care. (Cornell: tracheal collapse)

    Failure #1: carpeted foam steps

    Like everyone else, I started with the soft sponge staircase.

    What happened: Joseph used it for exactly two days, then wouldn’t put a paw on it again.

    What did not work for Joseph: the foam compressed underfoot, and the tread depth was under seven inches. It did not give him the stable footing he needed. That describes the steps I tried; it does not establish that all foam steps are unsuitable for every small senior dog.

    Failure #2: a telescoping plastic car ramp

    So I assumed rigid was the answer and dragged a sturdy vehicle ramp into the living room.

    What happened: the living room became an obstacle course, and Joseph fled in a panic if he got anywhere near it.

    What did not work for Joseph: the grip surface was coarse, like heavy sandpaper. The center section flexed a little under each step with a hollow drumming sound. And in our living room, the incline was too steep for him to use comfortably.

    The math manufacturers don’t print on the box

    If your dog refuses a ramp, do not force him onto it. Ask your veterinarian about pain, vision changes, and whether that setup suits his mobility.

    There is no veterinary-tested safe angle established by this account. Joseph’s experience does not set an 18-to-22-degree limit for other dogs. Ask your veterinarian or a rehabilitation professional to help assess the incline, surface, and access your dog needs.

    The formula is simple:

    Ramp length = furniture height ÷ sin(target angle)

    For a purely geometric example, an 18-inch rise at 18 degrees needs about 58.2 inches of sloping ramp. The examples below describe dimensions, not recommended or tested safety angles:

    Vertical riseSloping length at 18° (example only)Sloping length at 20° (example only)
    14 in (35.6 cm) — low sofa45.3 in (115.1 cm)40.9 in (104.0 cm)
    16 in (40.6 cm)51.8 in (131.5 cm)46.8 in (118.8 cm)
    18 in (45.7 cm) — typical sofa58.2 in (148.0 cm)52.6 in (133.7 cm)
    22 in (55.9 cm) — bed71.2 in (180.8 cm)64.3 in (163.4 cm)

    Sit with those numbers for a second.

    A ramp 32 to 36 inches long placed against an 18-inch rise makes an angle of about 30 to 34 degrees. That is a geometry example, not a prediction that a dog will slide or suffer a spinal injury. Ramp selection needs more than an angle calculation.

    What finally worked in 2012

    Nobody was selling a 57-inch indoor ramp with a rubber walking surface that year. So I bought plywood, wood strips for side rails, and a roll of grooved rubber matting, and I built one in the garage.

    It was ugly. These were the differences I noticed with Joseph; the measurements below were not professionally tested or established as safe specifications for other dogs.

    FactorWhat did not work for JosephMy homemade setup (not tested specifications)
    Incline30°+ (short ramp)Approximately 18–20°
    SurfaceCompressing foam, or sandpaper gritGrooved rubber matting
    Side railsFlat edges, nothing to feel1.4 in (3.5 cm) raised guide rails
    DeckFlexing, drumming, sinkingRigid and quiet under Joseph

    It took nine days

    This is the part nobody mentions. You don’t put a ramp down and have a dog use it.

    I started with the ramp lying completely flat on the floor and treats scattered along it, so he could get used to the surface. It took about nine days before Joseph trusted it enough to go up and down on his own.

    Once Joseph was using the ramp, he never jumped off that sofa again for the rest of his life. That was the change I observed; it does not show that a ramp treats an airway condition.

    What I’d check before buying one today

    If I were choosing a ramp today, I would bring these questions to my veterinarian or a rehabilitation professional:

    • Measure first, shop second. Measure the furniture height and available floor space. Ask what ramp dimensions suit your dog rather than treating the example angles above as a safe minimum.
    • Secure height adjustment. Check that the adjustment mechanism locks securely at the setting chosen for your dog.
    • Walking surface. Look for stable, nonslip footing and discuss suitable materials with your veterinarian. A palm test alone does not establish that a surface is safe for your dog.
    • Edges and vision. Ask your veterinarian about your dog’s eyesight and whether edge protection suits the ramp.

    One more, if the ramp folds: check that its hinges and locks are secure and that it is used according to the manufacturer’s instructions. A home check is not a professional safety assessment.

    If your dog has a collapsing trachea

    For a dog with tracheal collapse, a harness can avoid the neck pressure of a collar. (Cornell: tracheal collapse)

    Neck pressure can worsen coughing in dogs with tracheal collapse. This does not mean that a ramp treats the airway; follow your veterinarian’s plan for the condition.

    If he’s hesitating right now

    If your dog is standing at the bottom of the sofa, pausing before he commits, don’t file it away as ordinary aging.

    Hesitation can be a reason to ask your veterinarian about pain or changing mobility. The first step is to understand what your dog needs, rather than assume that changing the ramp angle will solve it. (AAHA senior care guidance)

    It took me two failures to understand that the thing that needed to change wasn’t my dog. It was my house.


    I spent twelve years with a Yorkshire Terrier named Joseph, and the last three of them learning how to make a house safe for an old dog. More about why I write this.

    I’m not a veterinarian. This is what I learned caring for one small dog through his senior years, and nothing here replaces an exam. Contact your vet about coughing or sudden reluctance to move. Breathing difficulty, blue gums or tongue, or fainting requires immediate emergency veterinary care.

    This article is for general informational purposes only and is not a substitute for professional veterinary advice, diagnosis, or treatment. Always consult your veterinarian regarding your pet’s specific health needs.

    Aging gracefully, together.

    Photo by andreaarden on Flickr, licensed under CC BY 2.0.

  • Stress & Depression in Indoor Cats: Signs & How to Manage It

    Stress & Depression in Indoor Cats: Signs & How to Manage It

    If your indoor cat has started hiding more, eating less, or seems to have simply lost interest in the things she used to enjoy, you’re not imagining it. Cats are quiet about distress by nature, and many owners only notice something is wrong once the change has been going on for a while. The good news is that feline stress and low mood are usually manageable once you know what to look for and what tends to help.

    Why Indoor Cats Get Stressed or Withdrawn

    Cats are creatures of routine and territory, and even small disruptions can feel large to them. Common triggers include moving to a new home, a new pet or family member, changes in your work schedule, construction noise, a dirty or relocated litter box, or the loss of a companion animal. Boredom and a lack of mental stimulation can look a lot like sadness in a cat that spends all its time indoors with little to do.

    It’s also worth remembering that cats are skilled at masking pain, so an underlying medical issue — arthritis, dental pain, or hyperthyroidism, for example — can produce the same withdrawn behavior as an emotional stressor. That overlap is exactly why ruling out a physical cause matters before assuming the issue is purely behavioral.

    Signs of Stress in Cats

    Stress in cats tends to show up as a shift toward hiding, tension, or defensive behavior. Watch for:

    • Hiding more than usual, especially in new or unfamiliar situations
    • Increased scratching, urine marking, or litter box avoidance
    • Overgrooming, sometimes to the point of bald patches
    • Dilated pupils, flattened ears, or a low, tucked posture
    • Increased vocalization or, in some cats, unusual silence
    • Aggression toward people or other pets that seems out of character

    Signs of Depression or Low Mood in Cats

    What owners often describe as a “depressed” cat usually looks more like a general shutdown — less energy, less interest, less engagement with the household. A sudden drop in appetite or activity is one of the most important signals to take seriously, since cats can develop a dangerous liver condition called hepatic lipidosis if they stop eating for more than a day or two.

    • Sleeping more than usual, even for a cat
    • Reduced interest in play, treats, or favorite toys
    • Eating noticeably less, or occasionally more, than normal
    • Withdrawing from family members or other pets
    • Reduced grooming, leading to a dull or unkempt coat
    • Spending long stretches in one hiding spot rather than moving around the home

    How to Help a Stressed or Withdrawn Cat

    Most indoor cats respond well to small, consistent changes that restore a sense of predictability and control over their environment. Try working through these steps over a couple of weeks rather than expecting an overnight fix.

    1. Keep a predictable routine. Feed, play, and clean the litter box at roughly the same times each day so your cat can anticipate what comes next.
    2. Add vertical and hidden spaces. A cat tree, a covered bed, or even a cardboard box gives your cat a sense of safety and a place to retreat when overwhelmed. A repurposed closet shelf or a blanket-draped chair works just as well as anything store-bought.
    3. Bring back play, in short sessions. Two or three five-minute sessions with a wand toy each day can rebuild engagement without asking too much of a cat who currently has little motivation.
    4. Check litter box basics. Keep one box per cat plus one extra, scoop daily, and avoid sudden litter or location changes, since litter box stress often overlaps with urinary problems — something we cover in more detail in our guide to urinary issues in indoor cats.
    5. Consider calming aids. Synthetic feline pheromone diffusers are widely used by cat owners and are generally considered a low-risk, low-cost first step; check current pricing and reviews before choosing a brand.
    6. Limit stressful stimuli where possible. Reduce exposure to outdoor cats through windows, keep loud household changes gradual, and introduce new pets slowly with separate spaces at first.

    When to Talk to Your Veterinarian

    Behavioral changes and medical problems can look identical in cats, so a veterinary visit is the right first step whenever the change is sudden, severe, or lasting. Reach out to your vet if you notice:

    • Not eating at all, or eating far less, for more than 24 hours
    • Hiding constantly and refusing to come out for meals or affection
    • New aggression, especially if it’s paired with other symptoms
    • Overgrooming severe enough to cause bald spots or skin irritation
    • Litter box changes such as straining, blood in urine, or accidents outside the box
    • Any weight loss, vomiting, or lethargy alongside the mood change

    A veterinarian can rule out pain, thyroid issues, or other medical causes before you invest time in behavioral changes at home. If you don’t yet have a vet you trust for these conversations, our guide on how to choose a good veterinarian walks through what to look for.

    Quick Takeaways

    • Hiding, appetite changes, and withdrawal are the earliest and most common signs of stress or low mood in indoor cats.
    • Common triggers include household changes, boredom, and conflict with other pets — but medical causes should always be ruled out first.
    • Routine, vertical space, short play sessions, and consistent litter box care are simple, low-cost ways to help.
    • A sudden or prolonged drop in appetite is an urgent sign that needs veterinary attention, not just a “wait and see” approach.
    • Improvement is usually gradual — give changes a couple of weeks before deciding whether they’re working.

    This article is for general informational purposes only and is not a substitute for professional veterinary advice, diagnosis, or treatment. Always consult your veterinarian regarding your pet’s specific health needs.

    Aging gracefully, together.

    Photo by Sole Montaner on Pexels.

    Sources and further reading

    These resources cover the specific topics listed below. They provide general education and do not constitute a veterinary review of this article.

  • How to Choose a Good Veterinarian

    How to Choose a Good Veterinarian

    If you’ve ever sat in a waiting room feeling rushed, unheard, or unsure whether the advice you just received was really right for your pet, you already know that not all veterinary care feels the same. As dogs and cats move into their senior years, the stakes of that relationship go up: more frequent visits, more complex decisions, and less room for a rushed five-minute appointment. Finding a veterinarian you genuinely trust is one of the most important things you can do for an aging pet.

    Why the Right Veterinarian Matters More As Pets Age

    A young, healthy animal can often get by with any competent clinic nearby. A senior dog or cat is a different story. Older pets tend to have overlapping conditions, arthritis alongside kidney changes alongside dental disease, and managing all of that well takes a veterinarian who is willing to slow down, explain trade-offs, and think about quality of life, not just test results.

    The right fit also matters for you. Caring for an aging pet is emotionally tiring, and a veterinary team that communicates clearly and treats you as a partner in decision-making makes a genuinely difficult stretch of life easier to manage.

    What to Look For in a Veterinary Practice

    Credentials and atmosphere both matter. A few things worth checking before you book a first appointment:

    • Accreditation status. In the United States, look for AAHA (American Animal Hospital Association) accreditation, which means the practice is voluntarily evaluated against standards for facilities, equipment, and patient care rather than just meeting the legal minimum to operate.
    • Comfort with senior and geriatric medicine. Ask directly whether the practice sees a lot of older pets and how they approach staged workups for animals with multiple health issues.
    • Clear pricing and estimates. A trustworthy clinic will walk you through cost ranges before running tests or starting treatment, not hand you a surprise bill.
    • Access to specialists. Even a great general practitioner will need to refer out occasionally for cardiology, oncology, or advanced dental work. Ask who they refer to and how that process works.
    • Emergency and after-hours guidance. Find out what happens if your pet has a problem at 9 p.m. on a Saturday, whether the practice has on-call staff, a partnership with a local emergency hospital, or simply a clear phone recommendation.
    • Facility cleanliness and low-stress handling. A calm, fear-conscious approach to handling matters even more for arthritic or anxious older pets who don’t tolerate being manhandled on a slippery table.

    Questions to Ask Before You Commit

    A short phone call or “meet the vet” visit can tell you a lot. Consider asking:

    1. How much time is typically allotted for a senior wellness exam compared to a routine check-up?
    2. Do you recommend baseline senior bloodwork, and at what age or life stage do you usually start it?
    3. How do you approach pain management for arthritis or chronic conditions?
    4. What is your philosophy on end-of-life care and quality-of-life conversations?
    5. Will I generally see the same veterinarian, or does the practice rotate doctors between visits?

    Pay attention not just to the answers but to how they’re delivered. A good sign is a veterinarian who welcomes questions rather than seeming rushed or defensive.

    Red Flags to Watch For

    • Appointments that consistently feel rushed, with little time for your questions.
    • Reluctance to explain why a test or treatment is being recommended.
    • Pressure to make an immediate decision on a costly procedure without a written estimate.
    • A revolving door of different veterinarians with no continuity in your pet’s records.
    • Dismissiveness about age-related symptoms, such as being told “that’s just old age” without further investigation of treatable causes.

    None of these on their own is necessarily disqualifying, clinics get busy, but a pattern of them is worth taking seriously.

    Making the Switch If You Need To

    Changing veterinarians can feel awkward, especially if your pet has been with the same clinic for years, but it’s a completely normal part of pet ownership. Most practices will transfer medical records to a new clinic on request, and you’re not obligated to explain your reasons. If cost is part of what’s driving the search, it can also help to look into how pet insurance works for dogs and cats before committing to a new long-term provider, since some clinics are more accustomed to working with insurance claims than others.

    Trust your instincts here. You know your pet’s normal behavior and history better than anyone walking into that exam room for the first time, and a good veterinarian will treat your observations as useful data, not an inconvenience.

    Quick Takeaways

    • Look for AAHA accreditation and genuine experience with senior pets, not just proximity to your home.
    • Ask about pricing transparency, referral networks, and after-hours emergency options before you need them.
    • A short meet-and-greet visit or phone call can reveal a lot about communication style and pace.
    • Rushed appointments, vague answers, or dismissiveness about age-related symptoms are worth taking seriously.
    • It’s normal and acceptable to switch veterinarians if the fit isn’t right, records can be transferred on request.

    This article is for general informational purposes only and is not a substitute for professional veterinary advice, diagnosis, or treatment. Always consult your veterinarian regarding your pet’s specific health needs.

    Aging gracefully, together.
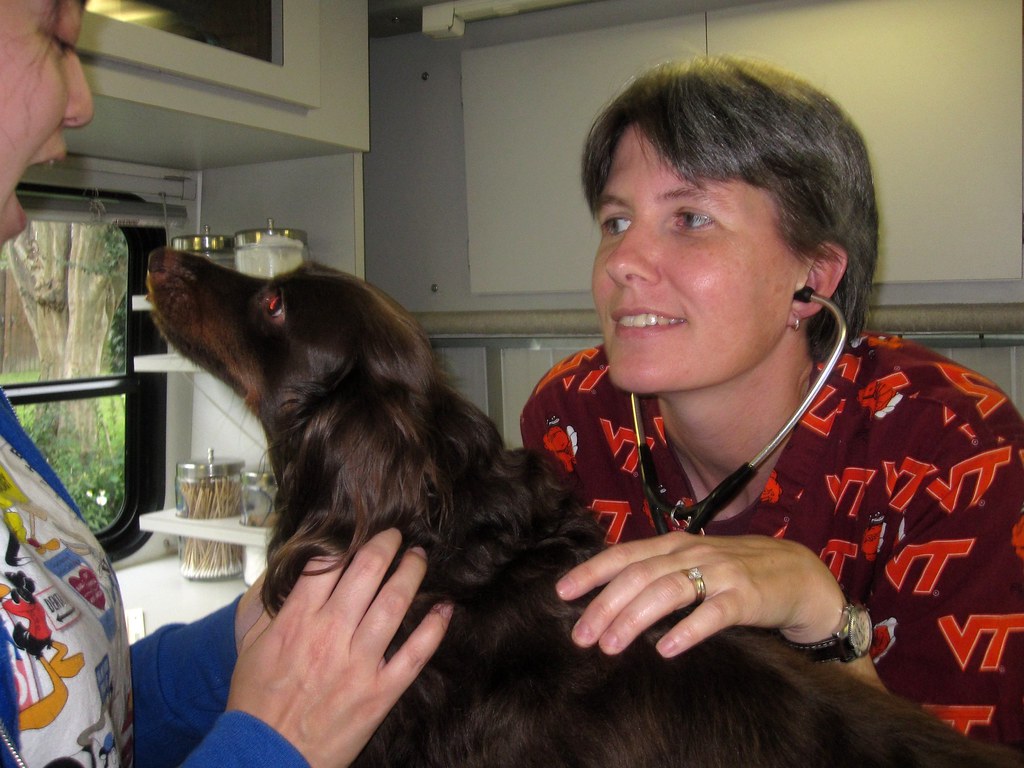
    Photo by Tobyotter / Flickr, licensed under CC BY 2.0.

    Sources and further reading

    These resources provide general background on the specific topics listed below. They are not a veterinary review of this article.